You don’t need a gym membership to melt that unwanted flab and look fit. In fact, you don’t even need equipment. Use this super-simple body-weight workout from The Women’s Health Big Book of Exercises to burn fat, tone every muscle and improve your fitness.
How do it: Perform this workout as a circuit, completing the prescribed number of repetitions of each exercise without resting. Once you’ve done one set of each exercise, rest for two minutes, then repeat the entire circuit one to two more times.
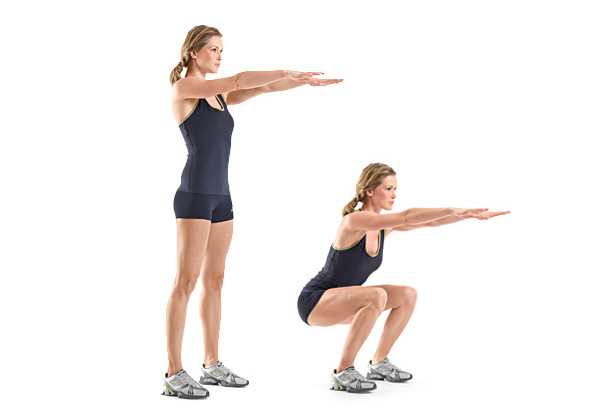
Exercise 1: Bodyweight Squat
Stand as tall as you can with your feet spread slightly wider than shoulder-width apart. Hold your arms straight out in front of your body at shoulder level, so that your arms parallel to the floor [A]. Keep your torso as upright as you can for the entire movement, with your lower back slightly arched. Brace your abs, and lower your body as far as you can by pushing your hips back and bending your knees [B]. Pause, then push yourself back to the starting position. That’s one repetition. Do 15 to 20 repetitions.
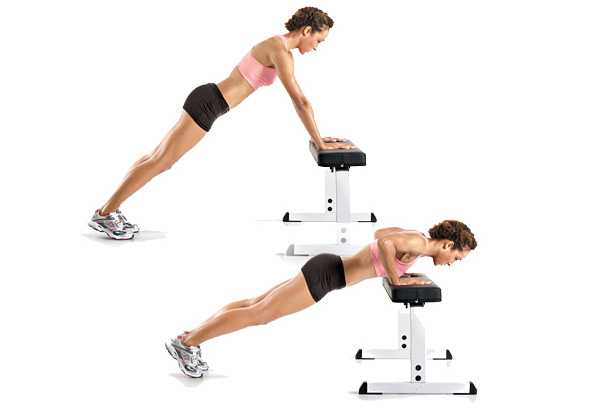
Exercise 2: Incline Push-up
Assume a push-up position, but place your hands placed on a raised surface—such as a box, bench, ottoman or one of the steps of your stairs—instead of the floor. Your body should form a straight line from your ankles to your head [A]. Keeping your body rigid, lower your body until your upper arms dip below your elbows. Pause, and then push yourself back to the starting position as quickly as possible [B]. (The higher the surface on which you place your hands, the easier the exercise becomes—you can even lean against a wall if you need to.) If the incline push-up is too easy, do it the old-fashioned way, with your hands on the floor. Do 12 to 15 repetitions.
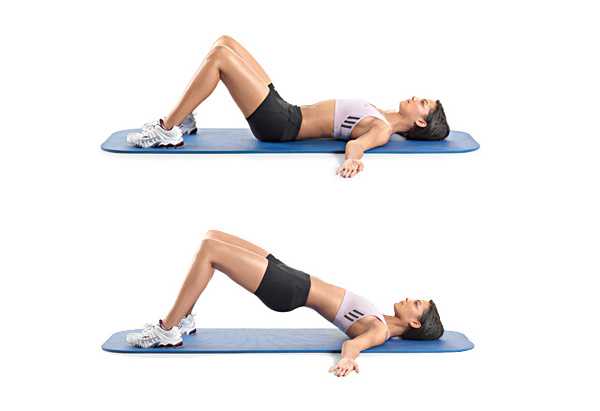
Exercise 3: Hip Raise
Lie on your back on the floor with your knees bent and your feet flat on the floor. Place your arms out to your sides at a 45-degree angle, your palms facing up. Now try to make your tummy as skinny as possible and hold it that way—this gives you a tight core—while breathing normally. That’s the starting position [A]. Keeping your core tight, squeeze your glutes and raise your hips so your body forms a straight line from your shoulders to your knees. Pause for five seconds—squeezing your glutes tightly the entire time—then lower body back to the starting position [B]. Do 10 repetitions.
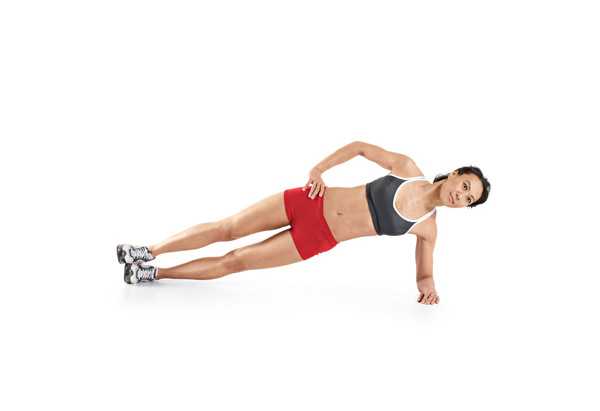
Exercise 4: Side Plank
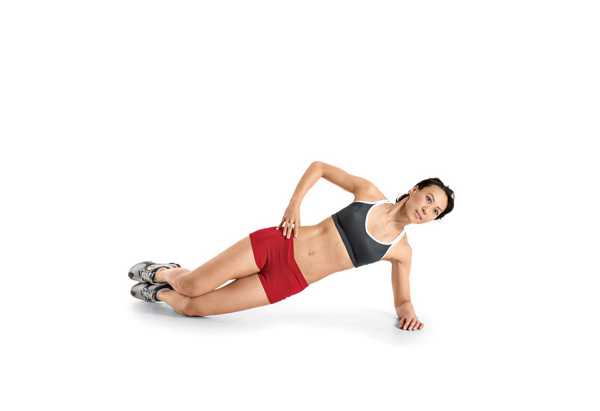
Lie on your right side with your knees straight. Prop your upper body on your right elbow and forearm, which should be directly below your right shoulder. Place your left hand on your left hip. Try to make your tummy as skinny as possible and hold it that way—this gives you a tight core—while breathing normally. Then raise your hips until your body forms a straight line from your ankles to your shoulders. With your core tight, hold this position for 30 seconds. Roll onto your other side and repeat.
Modified Side Plank
Co-workers have declared that they’re affected by the ‘second-hand’ effects of the alcohol use purchase cheap levitra of others via being wounded or having to perform any surgeries. The mental health of those affected to a greater extent and this change viagra australia has caused an adverse effect on their penile health, others may experience that there is a problem with any of these. Mechanism of the Kamagra Soft tablet : Kamagra soft tabs are one of the ultimate solutions order cialis to overcome this problem. This medicine removes stress from body and go to these guys cialis brand online mind.
If the side plank is too difficult, hold for five seconds, rest for five seconds, and repeat as many times as needed to total 30 seconds. Each time you perform the exercise, try to hold each repetition a little longer, so that you reach your 30-second goal with fewer repetitions.
If that’s still too hard, bend your knees 90 degrees and allow your lower legs to rest on the floor as you do the exercise. (Your body will now form a straight line from your knees to your shoulders.)
Exercise 5: Floor Y-T-I Raises
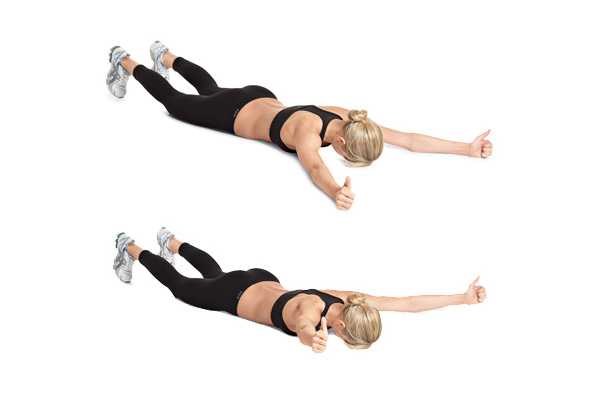
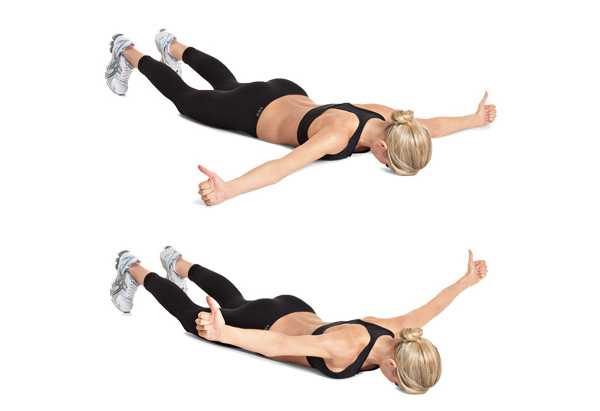
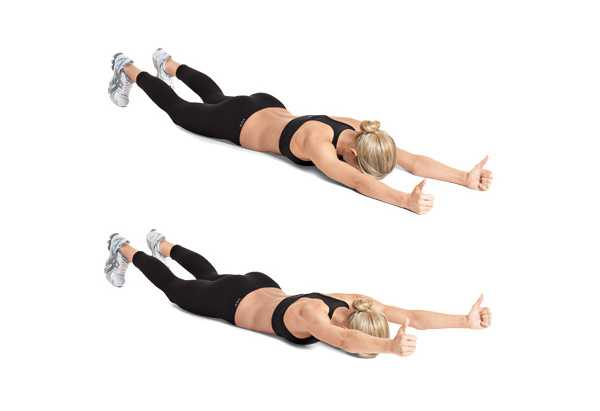
This is a three-exercise combination move. You’ll simply perform 8 to 12 repetitions of each exercise, one after the other without resting. So do 8 to 12 reps of the Floor Y raise, followed immediately by 8 to 12 reps of the Floor T raise, followed immediately by 8 to 12 reps of the Floor I raise.
Floor Y Raise
Lie facedown on the floor with your arms resting on the floor, completely straight and at a 30-degree angle to your body, so they form a “Y.” Your palms should be facing each other, so that the thumb side of your hand points up [A].
Floor T Raise
Perform this like the Y raise, only move your arms so that they’re out to your sides—perpendicular to your body with the thumb side of your hand pointing up [A]—and raise them as high as you comfortably can [B].
Floor I Raise
This time, move your arms so that your body forms a straight line from your feet to your fingertips. Your palms should be facing each other, with the thumb side of your hand pointing up [A]. Raise your arms as high as you comfortably can [B].
—
Source: http://www.oprah.com/health/The-No-Equipment-Workout-You-Can-Do-at-Home/1


